A well-designed cover can make or break the success of a book. As such, it’s vital to get it right.
To make your life easier, I’ll walk you through how to design a book cover in InDesign. The design I’ve created here is for my upcoming short story anthology, Anecdotes from the Lower East Side.
1. Create Your Template in InDesign
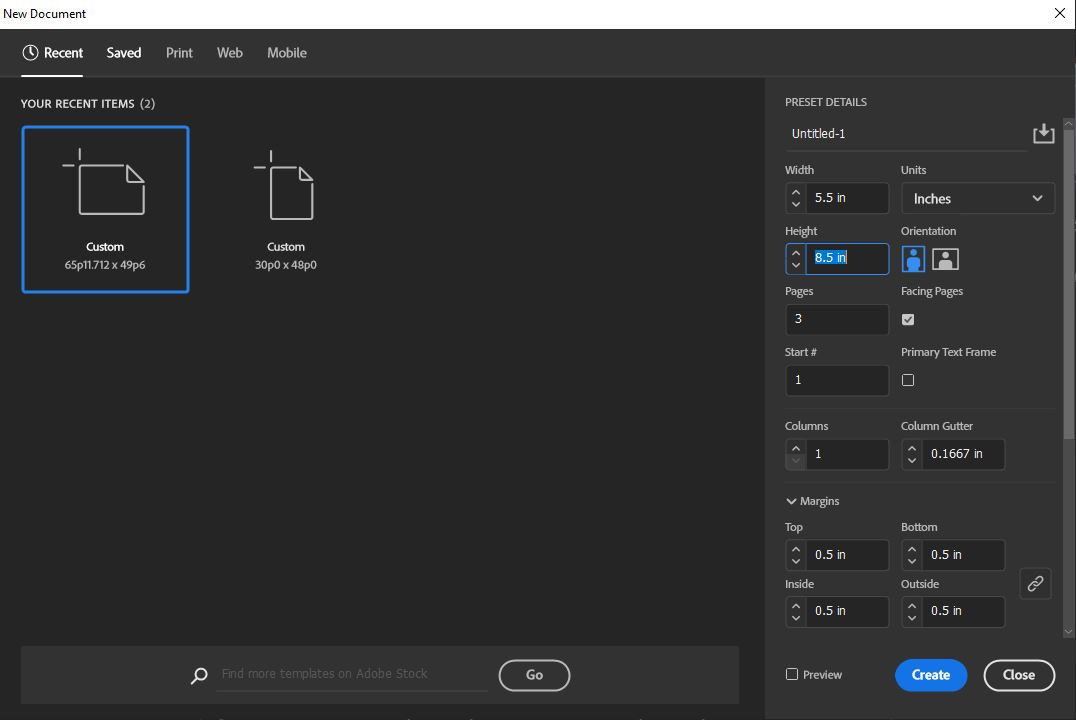
Before you do anything else, you need to set up a template in InDesign. Open InDesign, press New File, and choose a size.
Note that there will be three pages in this template: one for the front page, the spine, and the back page.
Press Create.
1. Arrange the Pages
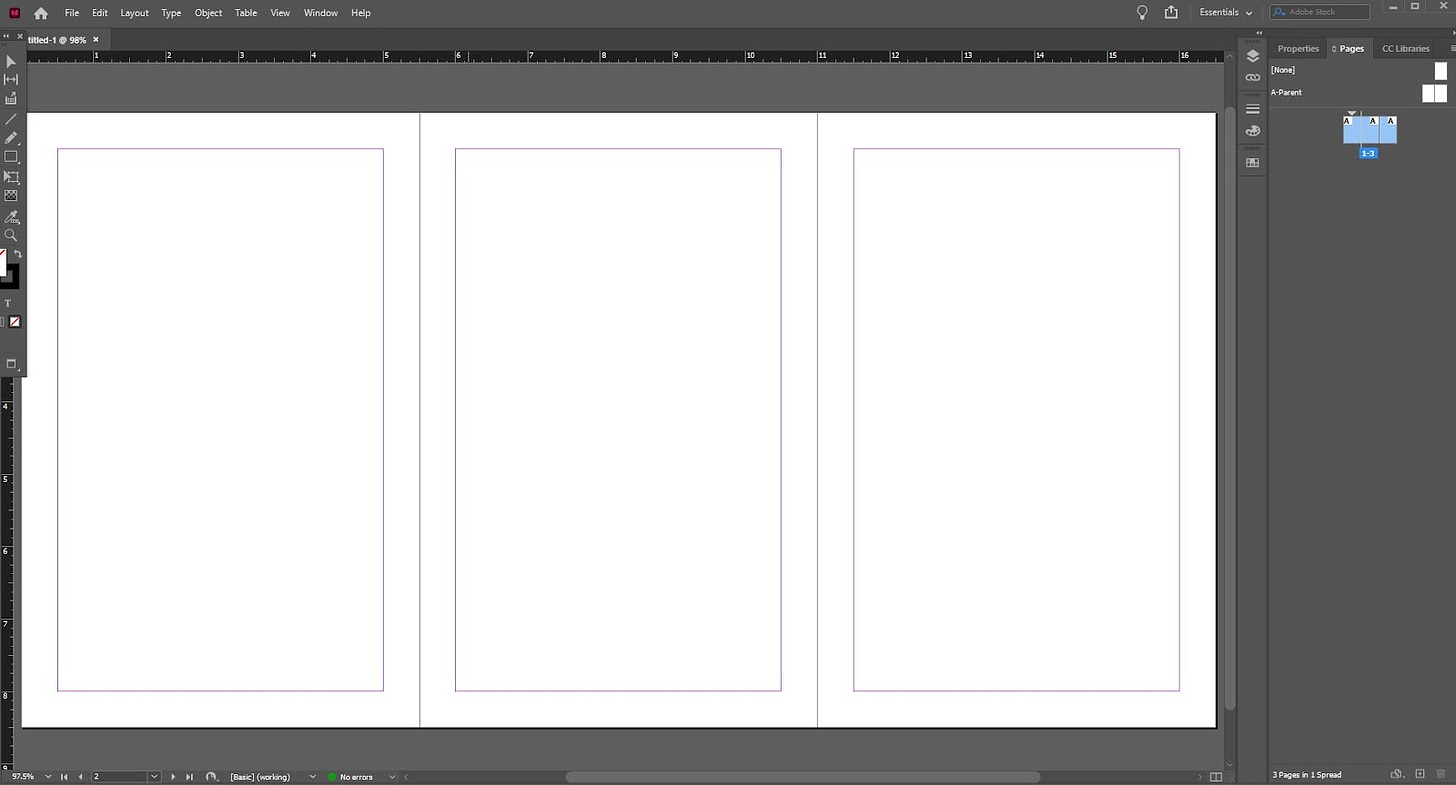
Next, open the Pages panel from Window. Click on the three horizontal lines in the Pages panel and uncheck Allow Document Pages to Shuffle.
You can now drag and drop the first page to the left side of page two, which will be your book spine.
3. Calculate the Width of the Spine
Before adjusting the spine, you need to calculate its width. You need two pieces of information:
The number of pages in your book: This will always be a multiple of four. If your manuscript doesn’t have the right number of pages, add blank pages until you get a multiple of four.
Paper weight: Paper weight for book pages or text stock usually range from 50lb to 80lb. Lighter weights are typically used for thick books, manuals, and textbooks, while heavier weights are best for image-heavy books with low page counts, such as art and photography books.
Once these are set, calculate the spine width by converting the paper weight into inches and multiplying it by the number of pages.
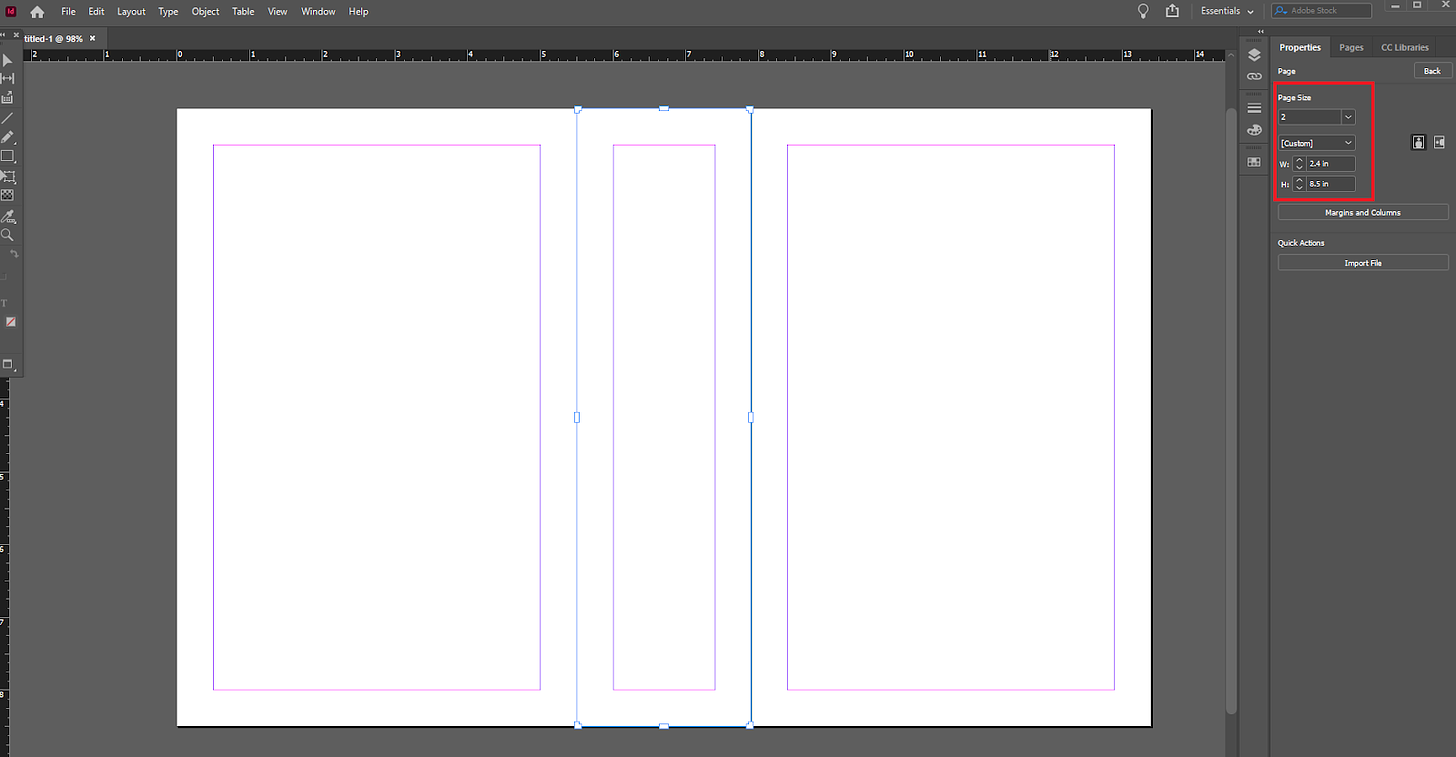
Let’s say you have 500 pages in your book and your paper weight is 60lb. A quick Google search for “60lb paper conversion table inches” reveals that 60lb text stock is equivalent to 0.0048 inches. Multiply 0.0048 inches by 500, and you’ll get 2.4 inches for your spine.
4. Adjust Page Two
Now that we’ve determined the width of the spine, we can adjust page two. Go to the Properties panel on the right and select “2” under Page. Press Edit Page to adjust the width from 5.5 to 2.4 inches.
Voila! You now have a book template.
5. Design the Front Cover, Spine, and Back Cover
You can now place images and text on your book spread.
Here’s how I created my cover:
Adding a Background Color
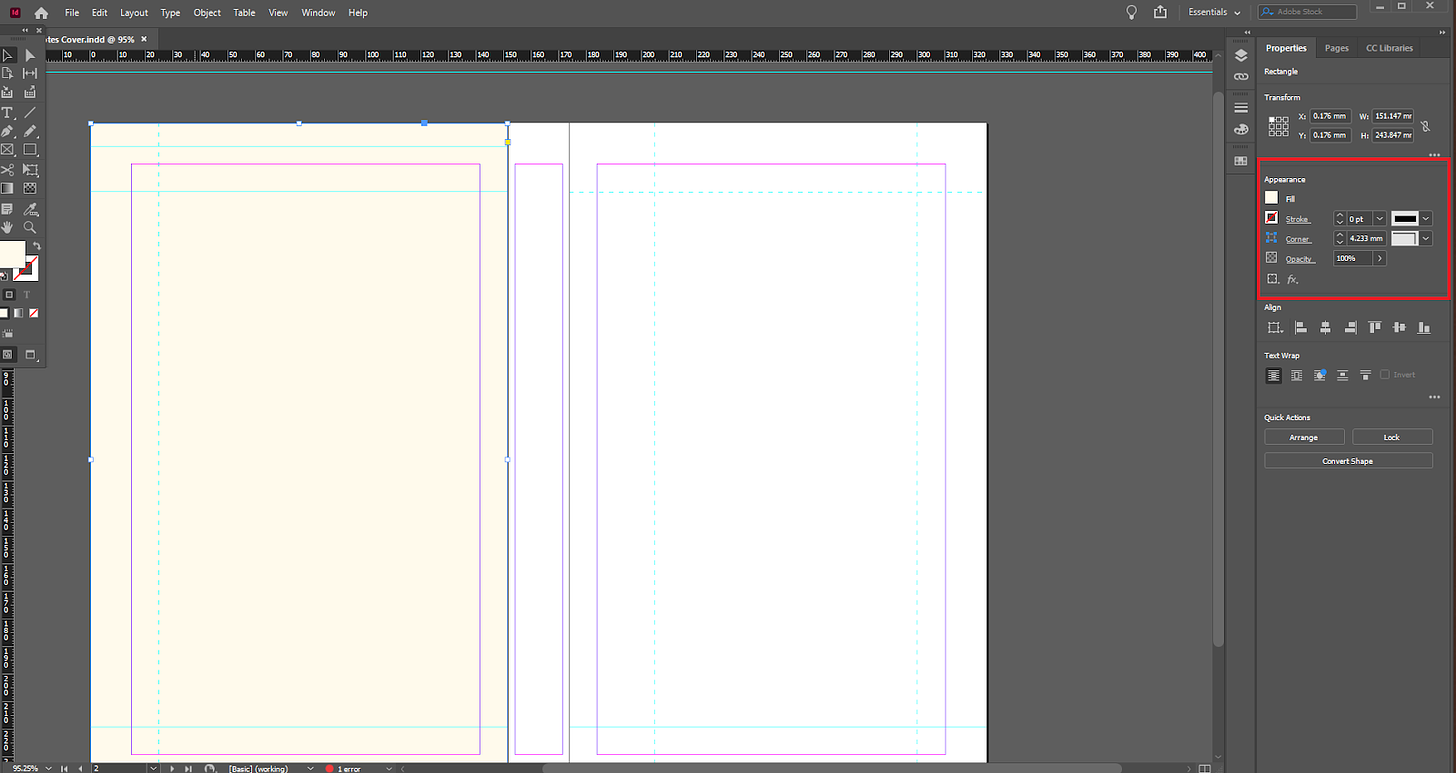
I clicked the Rectangle tool to draw a box covering the back cover. Then, I went to the Properties panel on the right, selected Fill under Appearance, and picked beige from the color palette tab.
Importing Cover Art
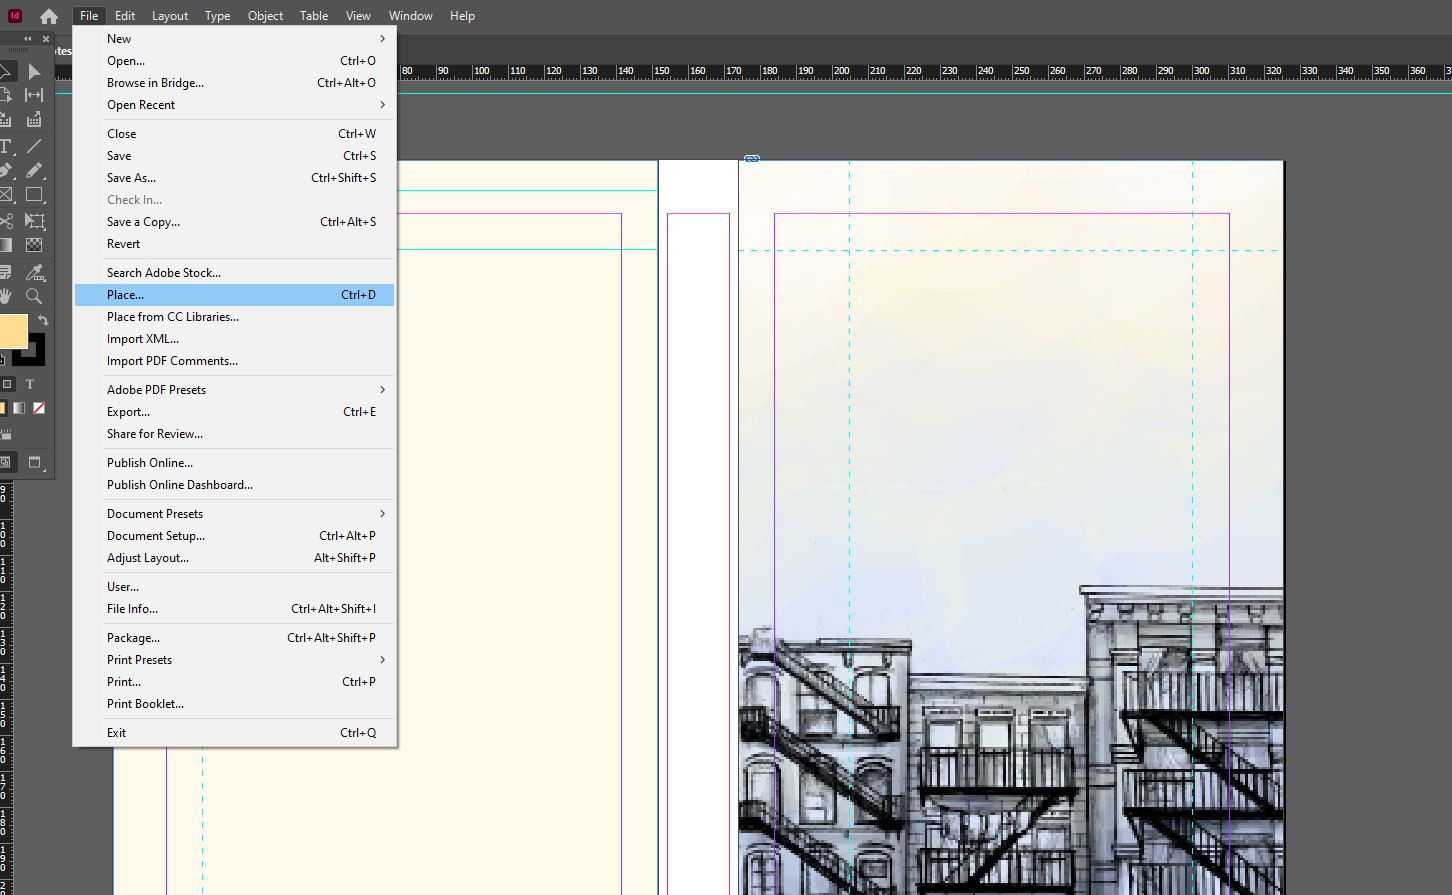
After setting up the background color for the back cover, I clicked File, selected Place, and chose one of my artworks.
6. Adding Typography
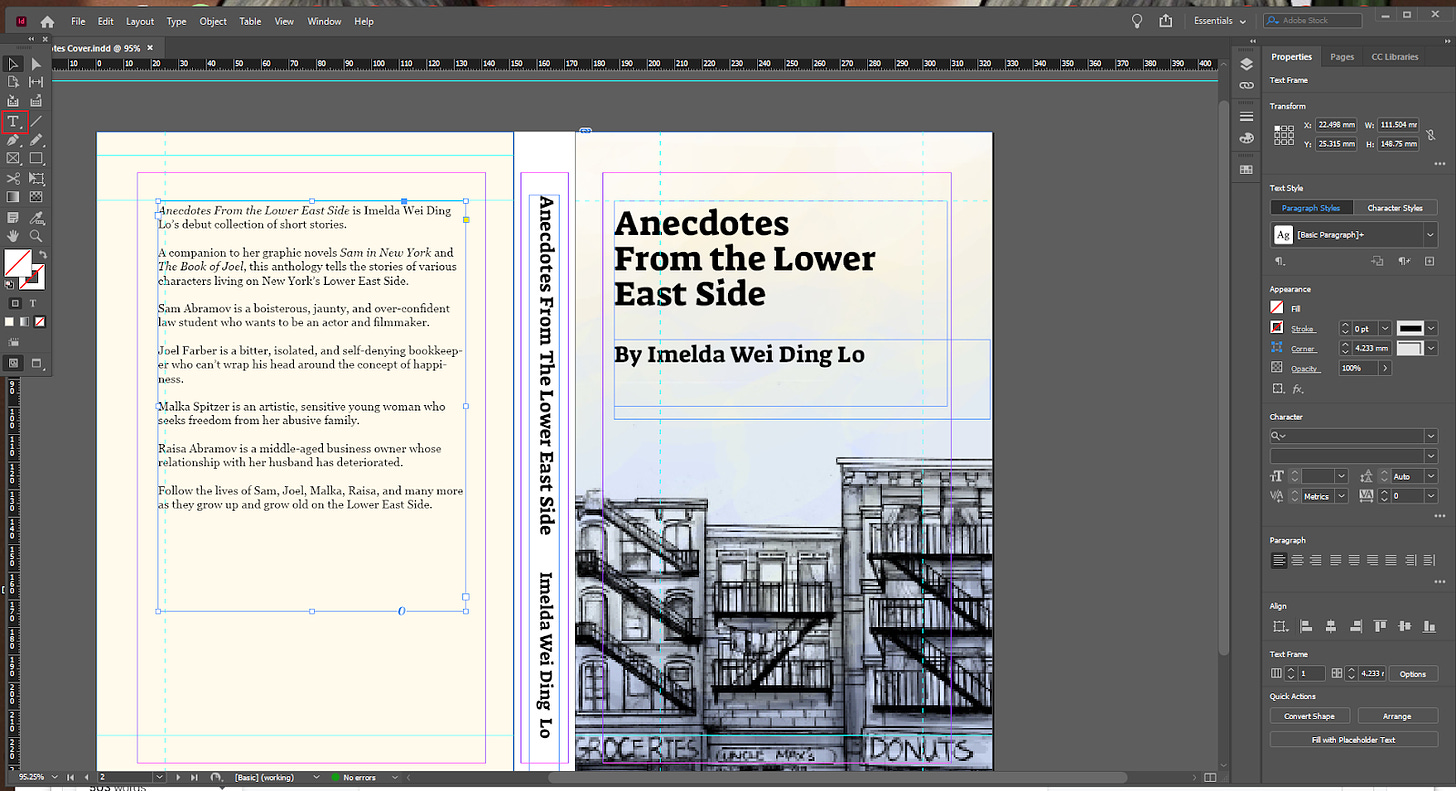
Finally, I added typography using the text tool. I used Suez One for titles and headings and Georgia for the back cover summary.
Here’s a close-up of the finished cover layout.
